.png?width=50&name=Untitled%20design%20(73).png)
BitSignal Enterprise was built for businesses of all sizes. This means supplying your whole team with digital business cards, keeping consistent branding, monitoring analytics, and more. Each employee’s digital business card can either be fully customizable, or the account admin and group manager (see Enterprise Managers and Admins) can limit which aspects of their profiles are customizable. The difference between those two styles comes down to the type of group they’re added to: Managed or Unmanaged.
So let’s talk about how managed and unmanaged groups work in BitSignal Enterprise, how they’re set up, and how to optimize them. For ease of explanation, this guide will be written with BitSignal Enterprise admins in mind, but whether you are a member, a manager, or an admin, you will still find all of the information you need to understand Enterprise groups.
Creating Groups
Let’s talk about how to set up groups in general. When you create your Enterprise account, two groups will be created by default: Open and Limited. Open is an unmanaged group, and Limited is a managed group. If you wish, these groups can be deleted or added to, but these will always be there when you create your profile.
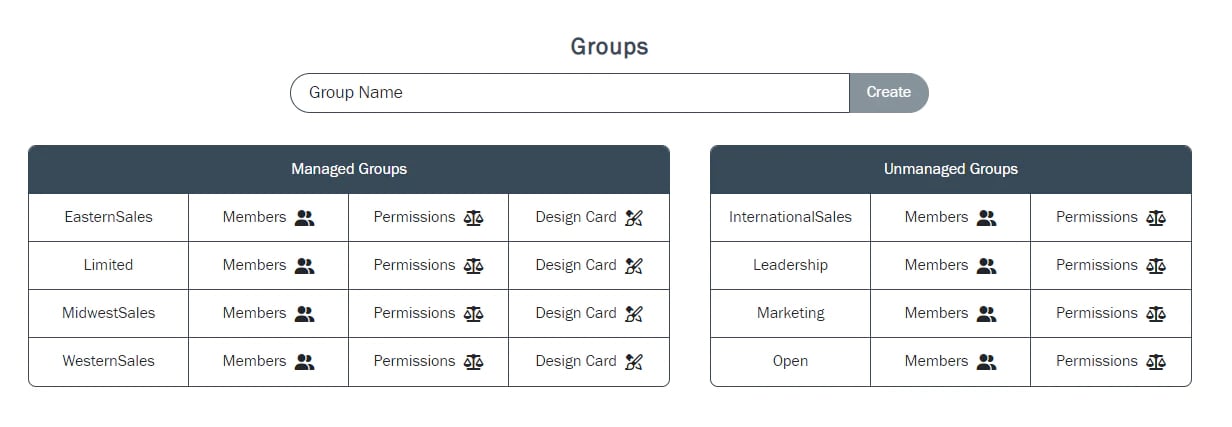
If you’d like to create your own groups, simply navigate to your dashboard, and either by using the menu icon or clicking the button ‘Groups’, a page will open showing your groups (which, if you’ve just created an account, should only show Open and Limited). In the text bar above, type the name of the group you wish to create. Your groups can be for a department like marketing or sales, a group of individuals like leadership or management, or whatever you need for your business. Once you’ve got a group title, click Create!
Once your group is created, you can add users to the group via the ‘Members’ tab, as well as decide which of your users should be a manager in the group. For more information on the role of managers, click here.
You can also decide whether or not the group you’ve created should be Managed or Unmanaged in the permissions tab, so before we go much further, let’s talk about the difference between the two.
Managed Groups
Let’s start with managed groups. At a glance, managed groups are groups where admins and managers have full control over the users’ profiles, what information your users can display, and their profile theme. The extent of this control can be as tight or loose as you’d like; check out the list of available options below.
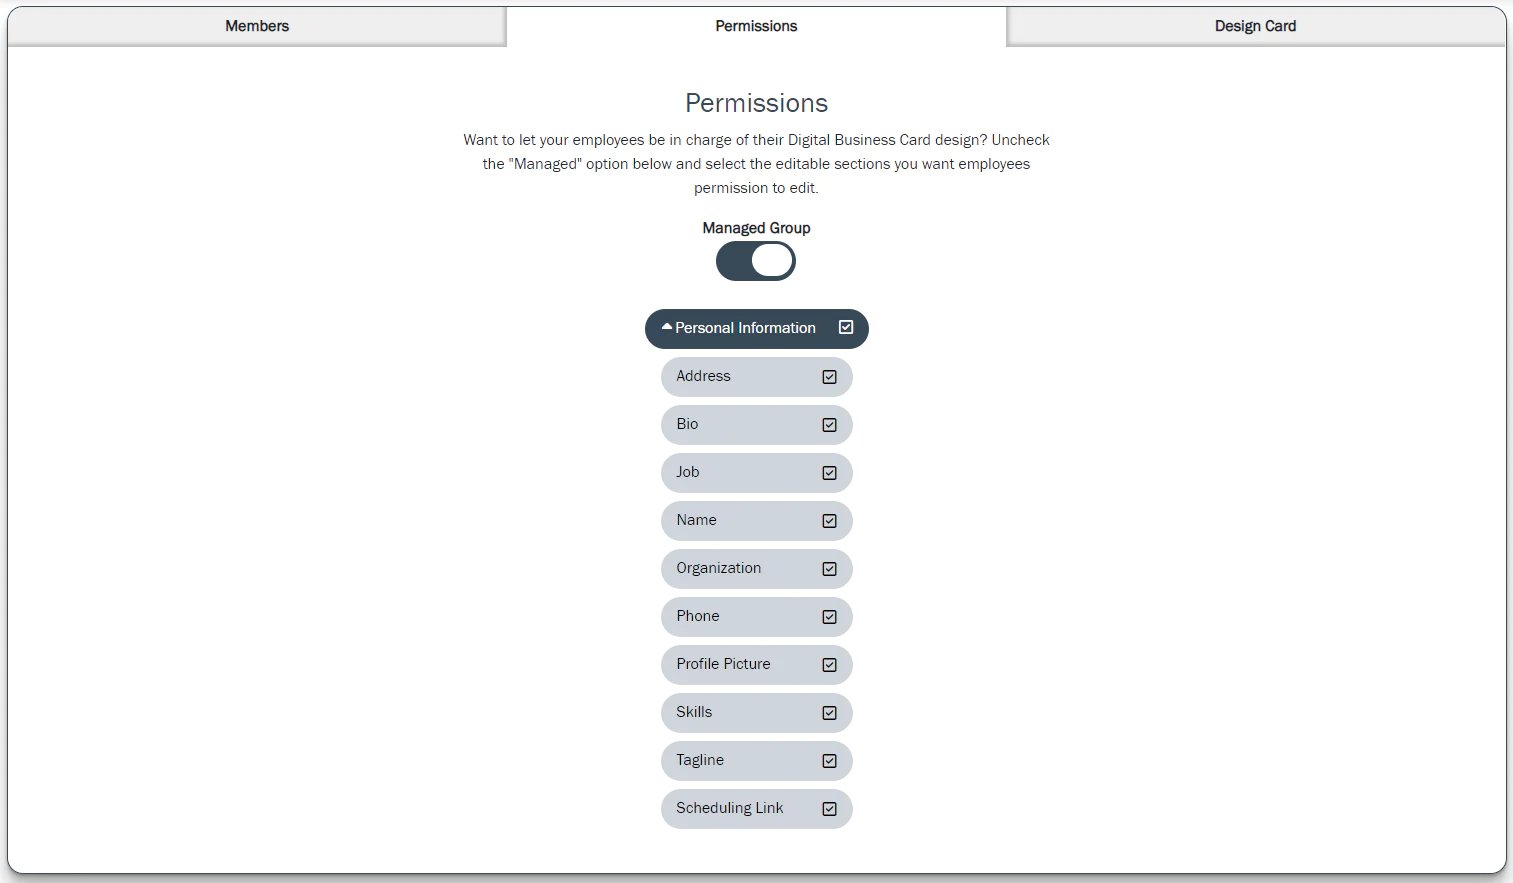
When you check a box from this list, it becomes a customizable box when your users begin to edit their profiles. For example, if you want your users to be able to customize their profile picture, their name, and their scheduling link, check those boxes and your users can freely change this information. Anything unchecked, therefore, is editable only by managers and admins.
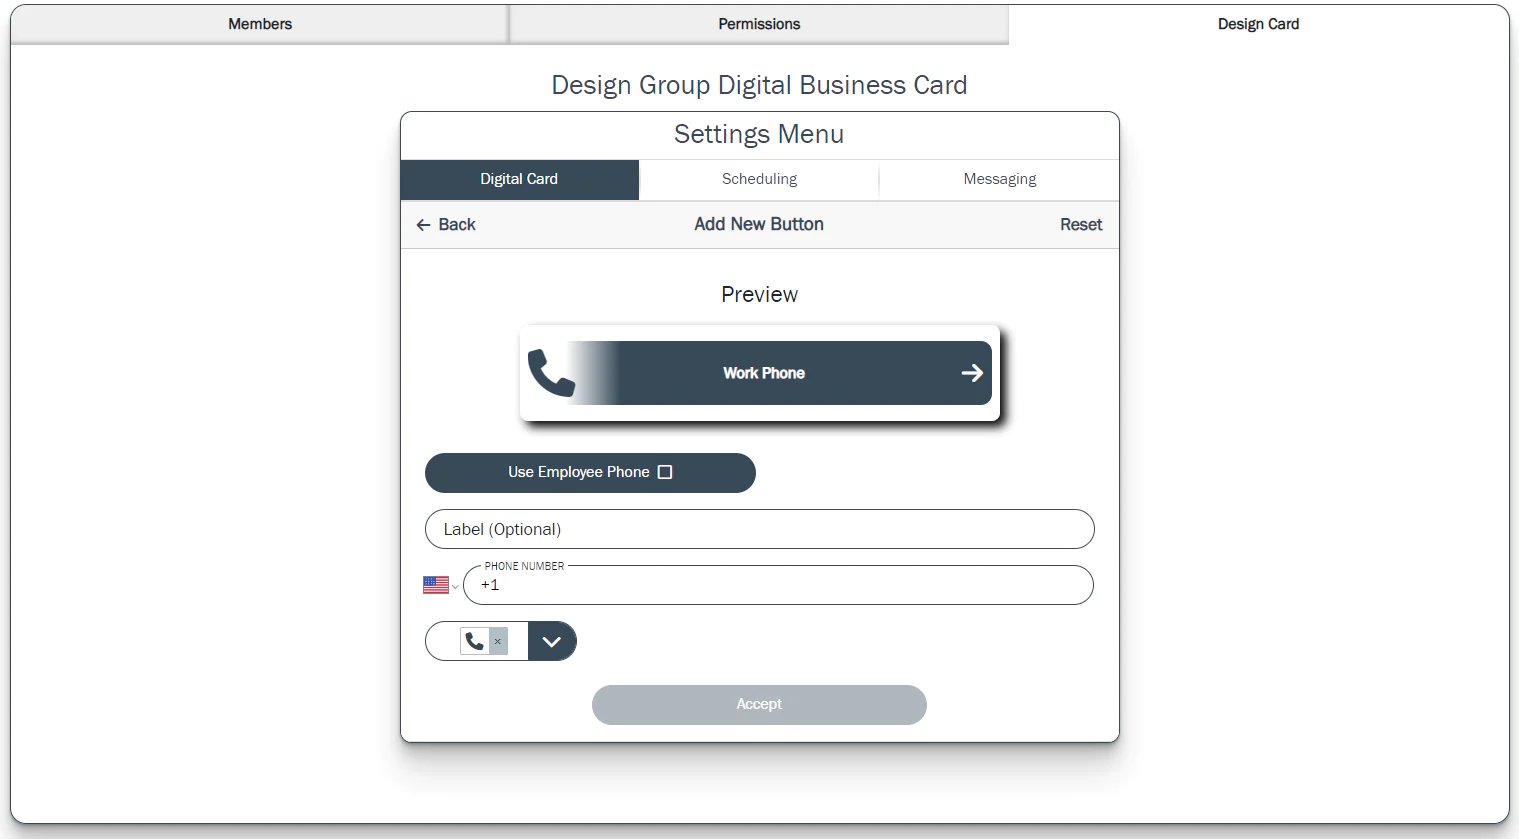
Let’s say you want each profile in your group to have a custom button to display your company’s website link. Move over to the ‘Design Card’ tab, click ‘Add a Button’, select ‘Website’, and customize it the way you want it with your information, and it will add that button to the profile of all members of the group! This also works for both the scheduling features and the messaging features.
Note: Phone numbers and emails will work a little differently. When you add a uniform phone number button, there is an additional button: Use Employee Phone. By checking this box, the button will appear on the profile of employees who have added their phone numbers to their accounts and will not appear on those who don’t. When the employee does add their phone number, the button will be automatically added to their profile!
The only thing left to do is customize the profile’s look with your branding! Every group can have a unique profile theme, or you can use one uniform theme to cover the whole business, the choice is yours! As for Unmanaged Groups...
Unmanaged Groups
In Unmanaged Groups, you can give your users complete creative control or help guide them with a little control, but unlike Managed Groups, much of the customization of the profile comes down to the user. There are still areas that admins and managers can control - the list of available information in managed groups is just a little longer.
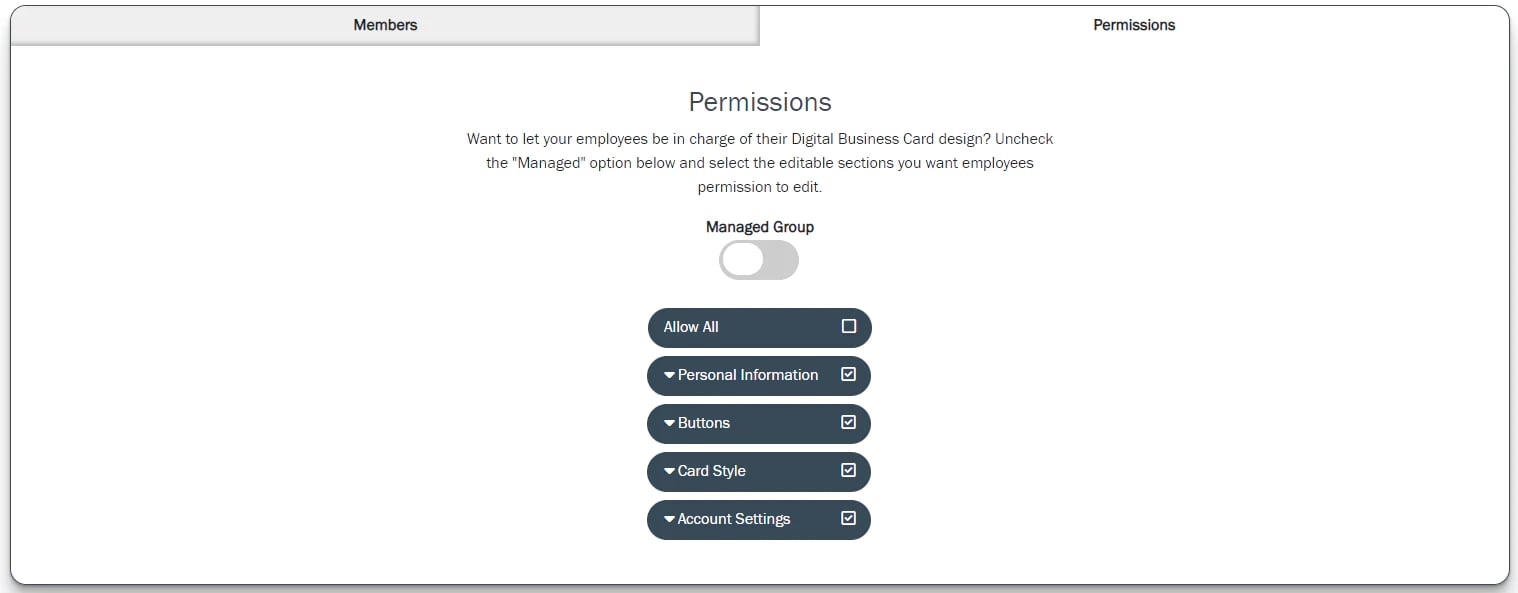
Everything from Personal Information to Custom Buttons to Profile Themes to Account Settings can be controlled in Unmanaged Groups; to allow your users access to everything on their profile, click ‘Allow All’. If you want to be more specific, for example, you don’t want them to change their organization or access their analytics, then simply uncheck the box and they will no longer be able to change or view that aspect of their profile.
Unmanaged Groups are the perfect way to give your users creative control over the look and feel of their profile; if that’s something you’re interested in, Unmanaged Groups are the way to go!
The Wrap Up
You now have all the information you need to equip your business or departments with the customization and management you need with your groups! Add users (something you can do right when you add your users to the account), customize their profiles, let them customize their own, and you’re off to the races.
The BitSignal Enterprise Tier is always implementing updates and improvements, so be sure to keep an eye out for more information as BitSignal grows!


%20(1).png?height=500&name=Admins%20and%20Managers%20(1)%20(1).png)